How to Use a Breg Ice Machine for Knee Recovery?

Recovering from knee surgery can make ordinary moments feel surprisingly difficult. A short walk may bring swelling, warmth, and a tight sensation around the joint. Used correctly, a Breg Ice Machine Knee system can provide controlled cold therapy while you rest, helping make early rehabilitation more manageable.

Orthopedic surgeon Dr. David Geier offers a practical reminder: “Cold therapy should support rehabilitation, not replace it.” That principle matters. An ice machine cannot repair tissue, restore strength, or replace prescribed exercises. It may, however, help reduce discomfort after physical therapy or daily movement. Always follow your surgeon’s instructions, especially regarding treatment duration and pressure.

Begin by checking the pad, tubing, water level, and electrical connection. Place a thin cloth barrier between the cooling pad and your skin. Keep the pad positioned evenly around the knee, without bending the tubing sharply. The skin should remain visible during regular checks. Stop if you notice numbness, unusual discoloration, burning, or worsening pain.

Small details matter.

This guide explains how to use a breg ice machine knee device safely and effectively during recovery. It covers setup, recommended routines, cleaning, storage, and common mistakes. Recovery is rarely perfectly linear. Some days feel easier; others require more rest. That variation deserves attention, not frustration. If swelling suddenly increases, the incision changes, or pain becomes severe, contact your healthcare professional instead of relying on cold therapy alone.
How to Use a Breg Ice Machine for Knee Recovery?

What a Breg Ice Machine Is and How It Supports Knee Recovery

A knee cold therapy machine is a portable unit that circulates chilled water through a flexible wrap. The wrap rests around the knee and delivers steady, controlled cooling. Unlike a loose ice bag, it can maintain contact while the user rests. Some models also provide gentle compression, which may help manage postoperative swelling. The device should support a clinician’s recovery plan, not replace it.

Place a thin cloth between the wrap and your skin unless medical instructions say otherwise. Use the prescribed temperature and treatment time. A common mistake is assuming colder means better. Excessive cooling may irritate skin or reduce circulation. Check the knee during treatment for unusual numbness, burning, pale skin, or increased pain. Stop and contact a healthcare professional if these symptoms appear.

After surgery or injury, cooling may make walking and prescribed exercises more comfortable. Reduced swelling can help the knee bend more easily, though results differ between people. Keep the knee supported and avoid tightening the wrap too much. Patients with reduced sensation, circulation problems, or diabetes should seek specific medical advice before using cold therapy. Recovery is rarely perfectly linear. A quieter day does not always mean healing has stopped, and extra treatment is not automatically helpful. Record treatment times, swelling changes, and discomfort to discuss during follow-up visits.
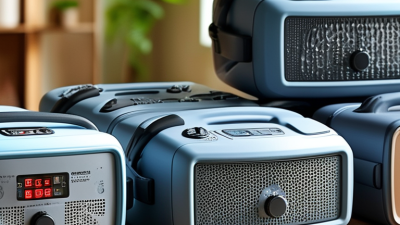
How to Prepare the Machine and Position Your Knee Safely

How to Use a Cold Therapy Machine for Knee Recovery?

Before using a cold therapy machine, read the clinical instructions and check your healthcare provider’s guidance. Recovery needs vary after surgery, injury, or physical therapy. Inspect the pad, tubing, power cord, and water reservoir for damage. Fill the reservoir only to its marked level, then add cold water and ice if instructed. Connect the tubing firmly. Test the flow before placing the pad on your knee.

Position your leg on a clean, stable surface, preferably slightly elevated. Place a thin cloth between your skin and the therapy pad. Never apply extreme cold directly to bare skin. Center the pad around the knee without covering an open wound or surgical dressing unless your clinician permits it. Secure the straps gently. They should hold the pad in place, not compress the joint. Check your skin every few minutes for unusual redness, paleness, burning, numbness, or increasing pain. Stop treatment and seek medical advice if these symptoms continue.

Tips: Keep the knee relaxed. Follow the prescribed treatment time. Do not sleep with the machine running unless specifically approved. I once tightened a wrap too much, assuming more pressure meant better cooling. It caused discomfort and reduced circulation. That mistake reminded me to check toe color and sensation regularly. Keep the machine below the knee when possible, and avoid pulling the tubing while moving.

How to Use a Cold Therapy Machine for Knee Recovery

Use this educational timeline to prepare the machine, position the knee safely, and complete a typical cold-therapy session. Follow your clinician’s instructions if they differ.

Safety reminders: Place a clean, dry cloth or cover between the cold pad and skin unless the device instructions specifically state otherwise. Keep the knee supported in a comfortable position, avoid wrapping the pad tightly, and check the skin regularly for excessive redness, numbness, burning, or discoloration. Stop the session and contact a healthcare professional if unusual symptoms occur. The 20-minute therapy value is an educational example; use the duration prescribed by your clinician or listed in the device instructions.

How to Use Cold Therapy Step by Step After Knee Surgery

After knee surgery, cold therapy can help reduce swelling and discomfort. Use the device only as directed by your surgeon or physical therapist. Their instructions should guide the treatment time and frequency.

Place the cooling pad over the knee, with a thin cloth between your skin and the pad. Never apply cold directly to the incision. Fill the reservoir with clean water and ice, then secure the lid firmly. Keep the tubing straight, so water can circulate properly. Set the unit beside your chair or bed. Elevate your leg slightly while treating it, if your clinician permits. Many patients use cold therapy for 15 to 20 minutes at a time. The exact schedule varies.

Check your skin every few minutes. It should feel cool, not painfully numb, pale, or burning. Stop immediately if you notice blistering, unusual color, increased pain, or tingling. Do not sleep while the machine is running. People with reduced sensation, diabetes, circulation problems, or fragile skin need specific medical advice. A common mistake is using more ice for faster results. Colder is not always better. Another is placing pressure over a fresh wound. Keep the incision clean and dry, and inspect it for spreading redness, drainage, or fever. If swelling suddenly worsens, contact your surgical team. I would also record each session, because memory becomes unreliable during recovery.

How to Use a Breg Ice Machine for Knee Recovery? - How to Use Cold Therapy Step by Step After Knee Surgery
Step Recovery Phase What to Do Typical Use Safety Checks
1 Before the first use Read the device instructions and confirm that cold therapy has been approved by the surgeon or clinical team. Before applying cold after surgery Do not use cold therapy over an open wound, dressing that must remain dry, impaired skin, or an area with reduced sensation unless specifically instructed.
2 Prepare the unit Fill the reservoir according to the instructions, secure the lid, connect the tubing, and check for leaks before placing the pad on the knee. Each time the unit is prepared Keep electrical connections and the pump away from standing water. Use clean water and maintain the unit as directed.
3 Position the knee Place the knee in a comfortable, supported position. If permitted, elevate the leg with the knee and lower leg supported rather than placing pressure directly behind the knee. During each cold-therapy session Avoid tight straps or pressure that causes numbness, tingling, color change, or increased pain.
4 Apply the cold pad Place a thin, dry cloth barrier between the cold pad and the skin unless the clinician or device instructions state otherwise. Secure the pad gently. Immediately before cooling Never place ice or a very cold pad directly on bare skin. Check that the incision dressing stays clean and dry.
5 Start treatment Turn on the unit and use the temperature or pressure setting prescribed by the healthcare professional. Remain alert to skin and nerve symptoms. Common clinical practice is about 15–20 minutes per session, but the prescribed schedule takes priority. Stop immediately if the skin becomes white, gray, blotchy, unusually hard, painful, numb, or intensely burning.
6 Rest between sessions Remove the pad, inspect the skin, and allow the area to return to its normal temperature before another session. Use only as often as prescribed; do not sleep with the unit operating unless specifically approved. Long or continuous exposure can cause cold injury. Do not wrap the knee so tightly that circulation is restricted.
7 First 48–72 hours Use cold therapy alongside the approved recovery plan, which may include elevation, prescribed medication, exercises, and weight-bearing restrictions. Swelling and discomfort are often greatest during the first several days, but the exact schedule varies by procedure. Cold therapy does not replace wound care, prescribed medication, physical therapy, or follow-up appointments.
8 After the early phase Continue only when it provides relief and remains part of the clinical plan. It may be useful after rehabilitation exercises if approved. Often used after activity or exercise for short sessions Reduce or stop use if pain, stiffness, skin irritation, or numbness worsens. Ask the care team how long to continue.
9 Cleaning and storage Empty and dry the reservoir and tubing as directed. Clean reusable components according to the manufacturer’s instructions. After use and before storage Do not share pads without appropriate cleaning. Do not use damaged tubing, cracked reservoirs, or faulty electrical parts.
10 When to contact the care team Report concerns about worsening symptoms instead of increasing the duration or intensity of cold therapy on your own. As soon as concerning symptoms appear Seek urgent medical advice for severe or increasing pain, rapidly worsening swelling, a cold or pale foot, new weakness or numbness, heavy drainage, fever, chest pain, or shortness of breath.

Important: The timing and duration of cold therapy depend on the type of knee surgery, circulation, sensation, skin condition, medications, and individual instructions. Follow the surgeon’s or physical therapist’s plan whenever it differs from this general guide.

How to Adjust Treatment Time, Temperature, and Water Levels

How to Use an Ice Machine for Knee Recovery

A cold therapy machine can support knee recovery after surgery or injury. Follow your surgeon’s instructions before changing any setting. Place the insulated pad evenly around the knee. Keep a thin cloth barrier between the pad and your skin.

Never apply extreme cold directly to the incision.

Treatment time should match your prescribed recovery plan. Many protocols use short sessions, often 15 to 20 minutes. Some patients need longer intervals, but more time is not always better.

Check the skin during each session.

Stop if you notice numbness, burning, unusual pain, pale skin, or increased swelling.

Do not sleep while the machine is running unless your medical team specifically approves it.

Use the lowest comfortable temperature. Cold should feel soothing, not sharp or painful. Add clean water and ice only to the marked reservoir lines.

Overfilling can reduce circulation through the pad or cause leaks. Keep the pump upright and check the tubing for bends.

I once underestimated how quickly a knee could become numb. That mistake taught me to check sooner, not later.

If the machine feels too cold, reduce the setting or end the session.

Contact a healthcare professional if swelling worsens, the incision drains, or the leg becomes unusually warm and red.

How to Clean the Device and Recognize Warning Signs

Use a cold-compression device only as directed by your clinician. Place a clean, dry cloth between the pad and your skin. Check the skin every 15–20 minutes. It should remain normally colored and warm enough to touch.

After use, unplug the unit, empty the water reservoir, and wash removable parts with mild soap. Rinse away residue, then air-dry everything fully. Never immerse the motor or electrical controls.

Wash your hands before handling the pad; the CDC reports that proper handwashing can reduce respiratory infections by 16–21%. A missed cleaning step can still introduce bacteria.

Stop treatment if you notice burning, increasing numbness, pale or blue skin, blisters, or unusual swelling. These signs may indicate excessive cold exposure or pressure.

Contact your surgical team for spreading redness, wound drainage, fever, worsening pain, or calf swelling. Seek emergency help for sudden chest pain or difficulty breathing.

A Cochrane review of postoperative cryotherapy trials found possible early pain relief, but the evidence quality remained low or very low. The American Academy of Orthopaedic Surgeons also describes cryotherapy as a short-term pain option, not a substitute for prescribed rehabilitation.

I would not rely on the device while sleeping unless your clinician specifically approves it. People often underestimate pressure. That mistake deserves attention.